
How to Add Products for Sale to Your Tazel.com Page
Selling photos, videos, PDFs, and other digital content on Tazel is simple. Follow these steps to create a post, attach your product files, set a price, and publish it to your page.
Step 1: Log In to Tazel
Log in to your creator account at Tazel.com.
Step 2: Select “Create Post”
From the navigation bar, click “+ Create Post.”

A pop-up menu will appear.
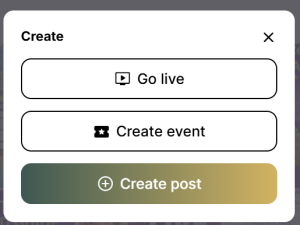
Click “+ Create Post” again.
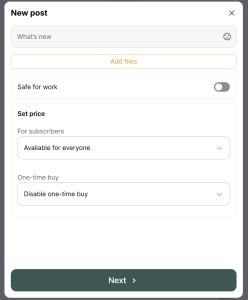
You will then see the post creation window.
Step 3: Write Your Product Description
The first field is labeled “What’s New?” This is where you describe the product or content included in your post.
You have plenty of room, so make your description interesting and appealing. Your goal is to give viewers a reason to unlock or purchase the post.
We recommend using this format:
Title
Give your product a short, attention-grabbing title.
Item Description
Explain what the buyer will receive. Include helpful details such as the number of photos, video length, file type, subject, or anything else that adds value.
Keywords
Add relevant words and phrases that describe your content and may help interested viewers discover it.
Step 4: Upload Your Product Files
Next, attach the files you want to include in the post. These will usually be photos or videos, but you can also upload PDFs and other supported file types.
You should also include a safe-for-work promotional image, commonly called album art, to represent the product.
Why Album Art Is So Important
Your album art is the promotional image viewers will see while browsing Tazel. It should be attractive, clear, and appropriate for public viewing.
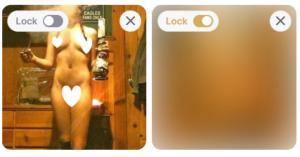
If you do not include unlocked album art, viewers—including your followers and subscribers—may only see a blurred image.
People are highly visual. Even the best title and description may be overlooked if the post does not have an image that catches their attention. Strong album art can make the difference between someone scrolling past your product and stopping to learn more.
Important Upload Instructions
Always upload your files in this order:
- Upload the product files first.
- Upload the album art last.
- Toggle the album art to “UNLOCKED.”
Only the promotional album art should be unlocked. The product files you are selling should remain locked.
If you forget to unlock the album art, it will appear blurred just like the paid product files, making the post much less appealing to viewers.
Step 5: Set the Price and Subscriber Access
The next section controls who can access the post and how much it will cost.
There are two possible access options:
- Subscriber access: Allows members of a selected subscription plan to view the post.
- One-time purchase: Allows non-subscribers to pay once to unlock the post.
If you have created a membership plan, it will appear in the subscriber-access section. If you are new to memberships, we recommend starting with one simple membership level.
Setting the One-Time Purchase Price
If the post is free, leave the setting on “Disable one-time buy.”
If the product is available for individual purchase, select a price from the drop-down menu. Available prices begin at $0.99 and go up to $49.99.
After making your selections, click “NEXT.”
Step 6: Schedule the Post
The scheduling section allows you to choose when the post will appear on your Tazel page.
If you want the post to go live immediately, leave the scheduling fields blank.
If you want it published later, select the desired date and time.
Click “NEXT” to continue.
Step 7: Preview and Publish
You will now see a preview of your completed post.
Review the following before publishing:
- Title and description
- Product files
- Unlocked album art
- Subscriber access
- One-time purchase price
- Publication date and time
If you need to make changes, click the back button and edit the appropriate section.
When everything looks correct, click “Publish.”
That’s it—your product is now available on your Tazel page!
A Recommended Posting Strategy
Regular posting can help your account remain active and visible throughout Tazel.
To get started:
- Prepare five to ten products in advance.
- Publish one product each day until your page begins to fill out.
- Once you have approximately 20 products available, continue publishing at least one new product per week.
Tazel’s marketing system favors active accounts that add fresh content regularly. Spacing out your posts gives followers a reason to return and provides you with more opportunities to promote your products.
Need Help?
If you have questions or need assistance adding products to your Tazel page, email: